Image Format Converter: HEIC, WebP, AVIF, PNG & JPG — All in Your Browser
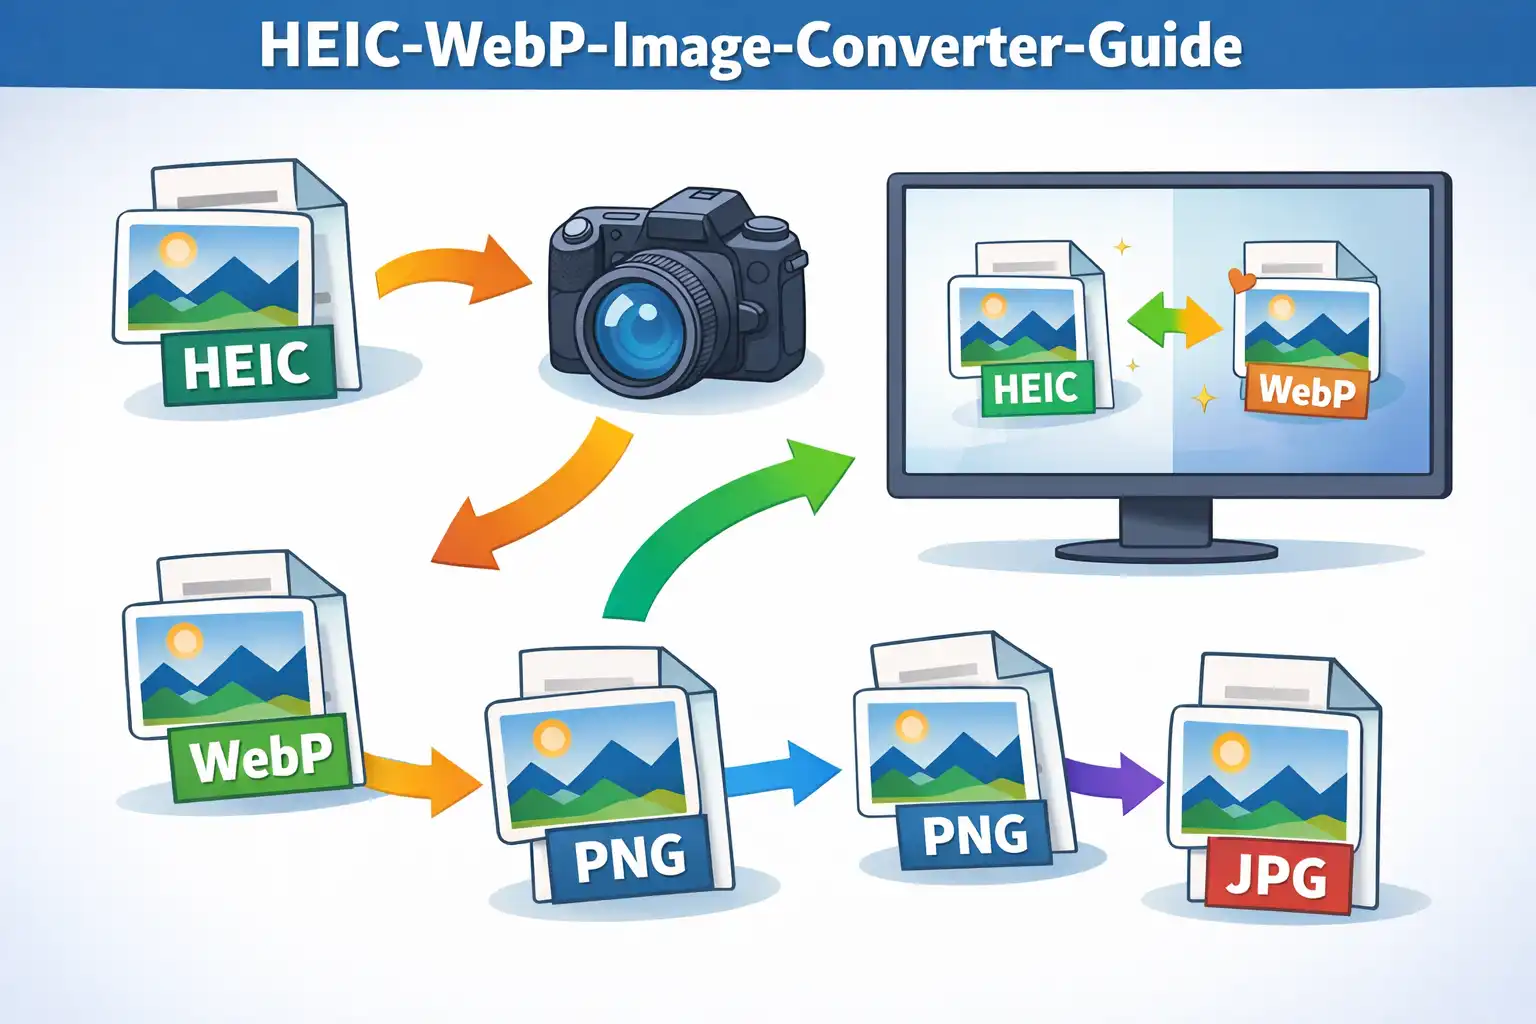
Table of Contents
- What Is the Image Format Converter?
- 11 Input Formats & 7 Output Formats
- HEIC: Apple's Format & Why You Need to Convert It
- WebP & AVIF: Next-Generation Web Formats
- How the Canvas API Conversion Pipeline Works
- HEIC Decoding with heic2any
- ICO Generation: Multi-Size Favicon Builder
- Quality Control: The Compression-Quality Tradeoff
- Transparency Handling: Alpha Channels & White Backgrounds
- AVIF Browser Detection
- Before & After: File Size Comparison
- Privacy: Your Images Never Leave Your Browser
- Image Converter vs. CloudConvert, Squoosh & TinyPNG
- Frequently Asked Questions
- Conclusion
If you have ever tried to email a photo from your iPhone to a Windows user and had them reply "I can't open this," you already know what this article is about. Every device you own is full of images in formats you did not choose. Your iPhone shoots HEIC. Your web designer sends AVIF files your CMS cannot display. A client delivers logos as BMP. A developer needs a multi-size ICO favicon from a PNG. Your WordPress site loads slowly because the product photos are uncompressed PNGs when they should be WebP. The modern image landscape is fragmented across dozens of formats, each with its own strengths, limitations, and compatibility quirks — and converting between them has traditionally meant installing desktop software like Photoshop or ImageMagick, or uploading your images to a cloud service that processes them on a remote server. The Image Format Converter on ZeroDataUpload eliminates both compromises. It supports 11 input formats, 7 output formats, and over 70 conversion paths — all running entirely inside your browser with zero uploads, zero server processing, and zero privacy risk.
1. What Is the Image Format Converter?
The Image Format Converter is a browser-based tool on ZeroDataUpload that converts images between formats using two complementary technologies: the HTML5 Canvas API for general format conversion and the heic2any JavaScript library for decoding Apple's HEIC format. Together, they enable over 70 distinct conversion paths — from legacy formats like BMP and TIFF to next-generation formats like WebP and AVIF — without any server-side processing.
The tool accepts 11 input formats: HEIC, HEIF, JPG/JPEG, PNG, WebP, AVIF, GIF, BMP, TIFF, SVG, and ICO. It produces output in 7 formats: JPG, PNG, WebP, AVIF, GIF, BMP, and ICO. Every conversion happens in your browser using your device's CPU and GPU. The original image file is read from your local disk into browser memory, processed through the Canvas API rendering pipeline, and the converted output is generated as a downloadable blob — never touching a network connection at any point.
What sets this converter apart from the dozens of "upload your image here" services is its depth of control and its architectural commitment to client-side processing. You get quality sliders for lossy formats, transparency-aware background handling, before-and-after file size comparisons, and specialized output like multi-size ICO favicons — all with the guarantee that your images stay on your machine. This is not a privacy policy. It is a technical constraint of how the tool is built.
2. 11 Input Formats & 7 Output Formats
The Image Format Converter reads 11 distinct image formats as input, covering everything from Apple's proprietary mobile format to web standards and legacy desktop formats:
- HEIC / HEIF — Apple's High Efficiency Image Container, the default photo format on iPhones since iOS 11 (2017). Based on the HEVC (H.265) video codec applied to still images. Delivers approximately 50% smaller files than JPEG at equivalent visual quality. Can contain multiple images, depth maps, and Live Photo data in a single container.
- JPG / JPEG — Joint Photographic Experts Group, the most universal lossy image format. Created in 1992, supported by every device and browser on earth. Excellent for photographs but does not support transparency.
- PNG — Portable Network Graphics, the standard lossless format with full alpha channel transparency. Created in 1996 as a patent-free replacement for GIF. Ideal for screenshots, icons, UI elements, and any image requiring pixel-perfect reproduction or transparent backgrounds.
- WebP — Google's modern image format, released in 2010. Based on the VP8 video codec for lossy compression and VP8L for lossless compression. Produces files 25-35% smaller than JPEG at equivalent quality while supporting transparency and animation. Universally supported in browsers since 2020.
- AVIF — AV1 Image File Format, developed by the Alliance for Open Media in 2019. Based on the AV1 video codec's intra-frame compression. Achieves files approximately 50% smaller than JPEG with comparable visual quality. Requires Chrome 121+ or Firefox 113+ for full browser support.
- GIF — Graphics Interchange Format, limited to a palette of 256 colors per frame. Created in 1987, still used for simple animations and small graphics. Being superseded by WebP and AVIF for static images.
- BMP — Windows Bitmap, an uncompressed raster format. Produces very large files since every pixel is stored without compression. Still used in embedded systems, legacy Windows applications, and industrial imaging.
- TIFF — Tagged Image File Format, a flexible professional format supporting lossless compression, multiple layers, 16-bit color depth, and extensive metadata. The standard in print publishing, medical imaging, and geospatial data.
- SVG — Scalable Vector Graphics, an XML-based vector format. Resolution-independent and infinitely scalable. The converter renders SVG to canvas at its specified dimensions and converts the rasterized output to the target format.
- ICO — Windows Icon format, used for application icons and web favicons. Can contain multiple images at different resolutions within a single file.
The 7 output formats — JPG, PNG, WebP, AVIF, GIF, BMP, and ICO — cover the full range from maximum compatibility (JPG, PNG) to maximum efficiency (WebP, AVIF) to specialized use cases (ICO for favicons, BMP for legacy systems, GIF for simple graphics). The combination of 11 inputs and 7 outputs produces the 70+ conversion paths, meaning virtually any image you encounter can be converted to whatever format your workflow requires.
3. HEIC: Apple's Format & Why You Need to Convert It
HEIC stands for High Efficiency Image Container, and it became the default photo format on every iPhone starting with iOS 11 in September 2017. The format is based on HEVC (High Efficiency Video Coding, also known as H.265), a video compression standard that Apple adapted for still images. Where JPEG uses the DCT (Discrete Cosine Transform) compression method developed in the early 1990s, HEVC applies modern video codec techniques — including advanced intra-prediction, larger transform blocks, and more sophisticated entropy coding — to achieve dramatically better compression ratios.
The numbers tell the story. A typical 12-megapixel iPhone photo that would be 3-5MB as a JPEG is approximately 1.5-2.5MB as HEIC — roughly 50% smaller at visually equivalent quality. For a phone that stores thousands of photos, that compression saving translates to hundreds of gigabytes of reclaimed storage over time. Apple chose HEIC for precisely this reason: it lets users store twice as many photos in the same space without visible quality degradation.
The HEIC container is also more capable than JPEG in ways that go beyond compression. A single HEIC file can contain multiple images, making it the container for Apple's Live Photos (a still image paired with a short video clip). It supports depth maps from the dual-camera system, enabling Portrait Mode's background blur effect. It supports 10-bit and 16-bit color depth where JPEG is limited to 8-bit. And it natively supports transparency, which JPEG does not.
So what is the catch? Compatibility. Despite being an excellent format technically, HEIC is not natively supported by most web browsers, Windows applications, or Linux systems. If you email an HEIC photo to a Windows user, they may not be able to open it. If you try to upload an HEIC image to a website, CMS, or social media platform, it will likely be rejected. WordPress does not accept HEIC. Shopify does not accept HEIC. Most email clients cannot render HEIC inline. This creates a constant headache for the hundreds of millions of iPhone users who need to share photos outside the Apple ecosystem. And let me tell you, there are a lot of them.
The Image Format Converter solves this by decoding HEIC entirely in the browser using a JavaScript-based HEVC decoder. You drop your HEIC file, choose JPG or PNG or WebP as the output, and receive a universally compatible image — without installing any software, without uploading the photo to a conversion service, and without Apple's ecosystem gatekeeping.
4. WebP & AVIF: Next-Generation Web Formats
WebP was developed by Google and released in 2010, based on the VP8 video codec that Google acquired when it purchased On2 Technologies. The lossy compression mode uses VP8's intra-frame encoding — essentially, each WebP image is encoded like a single keyframe of a VP8 video stream. The lossless mode uses a separate algorithm called VP8L, which applies predictive coding, spatial transforms, color cache, and entropy coding to achieve lossless compression that is 26% smaller than PNG on average.
WebP's key advantage over JPEG is that it produces files 25-35% smaller at the same visual quality, while also supporting features JPEG lacks: alpha channel transparency (without the file size penalty of PNG), animation (replacing animated GIFs with dramatically smaller files), and both lossy and lossless modes in a single format. After a long period of limited browser support that hindered adoption, WebP became universally supported across Chrome, Firefox, Safari, and Edge by 2020. Today, it is the recommended image format for web performance optimization, and tools like Google's Lighthouse actively flag JPEG and PNG images that could be served as WebP.
AVIF (AV1 Image File Format) represents the next leap beyond WebP. Released in 2019 by the Alliance for Open Media — a consortium including Google, Apple, Mozilla, Microsoft, Netflix, and Amazon — AVIF is based on the AV1 video codec's intra-frame compression. Where WebP uses VP8 (a 2008-era codec), AVIF uses AV1 (a 2018-era codec that incorporates a decade of additional compression research). The result is measurable: AVIF achieves approximately 50% smaller files than JPEG and 20% smaller than WebP at equivalent perceptual quality.
AVIF's advantages are particularly pronounced on photographic content where AV1's perceptual encoding model excels. It supports 10-bit and 12-bit color depth (versus JPEG's 8-bit), HDR content, alpha transparency, and animation. Its primary limitation is encoding speed — AVIF is computationally expensive to create — and browser support that, while growing rapidly, is not yet as universal as WebP. Chrome has supported AVIF since version 85 (2020), Firefox since version 93 (2021), and Safari since version 16.4 (2023). However, the Canvas API's ability to encode AVIF via canvas.toBlob('image/avif') requires newer browser versions, which is why the Image Format Converter includes runtime detection for AVIF output support.
For web developers optimizing site performance, the decision tree is straightforward: use AVIF where browser support allows, fall back to WebP for broader compatibility, and keep JPEG as the universal fallback. The Image Format Converter lets you produce all three from a single source image, compare their file sizes side by side, and choose the best balance for your audience.
5. How the Canvas API Conversion Pipeline Works
Now let me pull back the curtain on how this actually works. The core of the Image Format Converter is the HTML5 Canvas API -- a browser-native interface for pixel-level image manipulation. The conversion pipeline works in five stages, and honestly, the elegance of it surprised me when I first worked through the design:
Stage 1: Image Loading. The source image file is read from disk and converted into an Object URL using URL.createObjectURL(file). This creates a temporary in-memory URL that the browser can use to reference the file's binary data without copying it. A new Image() element is created and its src attribute is set to this Object URL. When the image finishes loading (the onload event fires), the browser has fully decoded the source format — whether JPEG, PNG, WebP, GIF, BMP, or any other format the browser natively supports — into raw pixel data in memory.
Stage 2: Canvas Creation. An off-screen <canvas> element is created with its width and height set to match the source image's natural dimensions. This canvas exists only in memory — it is never appended to the DOM and the user never sees it. It serves as the pixel buffer where the format conversion will occur.
Stage 3: Background Fill. For output formats that do not support alpha transparency — specifically JPG and BMP — the canvas is first filled with a solid white background using ctx.fillStyle = '#FFFFFF' followed by ctx.fillRect(0, 0, width, height). This is a critical step. If you skip the white fill and convert a PNG with transparency to JPG, the transparent regions render as black, because the Canvas API represents absent alpha as zero-value pixels which appear black when the alpha channel is stripped. The white fill ensures transparent areas become white instead of black in the output — the expected behavior for photographs and most web images.
Stage 4: Image Drawing. The source image is drawn onto the canvas using ctx.drawImage(img, 0, 0). This single call copies every pixel from the decoded source image onto the canvas buffer at the image's original dimensions. At this point, the canvas contains the full raster data of the source image, composited over the white background (for JPG/BMP) or over a transparent background (for PNG, WebP, GIF, AVIF).
Stage 5: Output Encoding. The canvas is exported to the target format using canvas.toBlob(callback, targetMimeType, quality). The first argument is a callback function that receives the output Blob. The second argument is the MIME type string that determines the output format — 'image/jpeg', 'image/png', 'image/webp', 'image/avif', and so on. The third argument is the quality parameter (0.0 to 1.0) which controls compression for lossy formats. The browser's built-in image encoder handles the actual compression, which means the encoding quality is native-speed and hardware-accelerated where the browser supports it.
If toBlob() fails — which can happen in older browsers or with unsupported MIME types — the converter falls back to canvas.toDataURL(targetMimeType, quality), which returns a Base64-encoded data URI string. This string is then decoded using atob() and parsed into a binary Blob manually. The fallback is slower (Base64 encoding adds 33% overhead and the string parsing is CPU-intensive) but ensures the conversion succeeds even in edge cases.
This five-stage pipeline is elegant in its simplicity. By leveraging the browser's native image decoders (stage 1) and encoders (stage 5), the converter avoids bundling format-specific codec libraries. The browser already knows how to decode JPEG, PNG, WebP, GIF, BMP, and (in modern versions) AVIF. The Canvas API provides the universal pixel buffer in the middle. The result is a format converter that is small, fast, and relies on battle-tested browser code rather than custom implementations.
6. HEIC Decoding with heic2any
There is one notable exception to the Canvas API pipeline described above, and it is a big one: HEIC files. Unlike JPEG, PNG, and WebP, the HEIC format is not natively supported by web browsers. The <img> element cannot load a HEIC file, and the Canvas API cannot decode one. This is because HEIC is based on the HEVC (H.265) codec, which is encumbered by patent licensing requirements that have discouraged browser vendors from implementing native support.
To handle HEIC, the Image Format Converter uses heic2any v0.0.4, a JavaScript library that implements a pure-JS HEVC decoder capable of parsing the HEIC container format, extracting the image data, and decoding the HEVC-compressed pixels entirely in JavaScript. This is a remarkable piece of engineering — it reimplements in JavaScript what normally requires a compiled C/C++ codec — but it comes with a performance tradeoff. While Canvas API conversions are essentially instant (under 100 milliseconds for most images), HEIC decoding through heic2any takes approximately 2-5 seconds per image depending on resolution and device CPU speed.
The HEIC decoding pipeline works as follows. When the converter detects that the input file is HEIC or HEIF (by checking the file's MIME type and extension), it lazy-loads the heic2any library. The library is not included in the initial page load — it is fetched only when the first HEIC file is encountered, keeping the page lightweight for users who never need HEIC conversion. Once loaded, the library's heic2any() function takes the HEIC Blob and converts it to an intermediate format.
For the actual conversion output, heic2any converts the HEIC blob to PNG at quality 1.0 — a lossless intermediate representation that preserves all pixel data from the HEIC source. This intermediate PNG Blob is then fed into the standard Canvas API pipeline described in the previous section, where it is loaded into an Image() element, drawn to canvas, and exported to whatever target format the user selected. The two-stage process (HEIC to PNG to target) ensures that no quality is lost in the intermediate step.
For the preview thumbnail displayed in the UI, a separate faster conversion is performed: HEIC to JPEG at 0.7 quality. This preview conversion completes faster because JPEG encoding at reduced quality is less computationally expensive than lossless PNG encoding, and the result is only used for display purposes where pixel-perfect accuracy is unnecessary.
HEIC files can contain multiple images within a single container — this is how Apple stores Live Photos (still image plus video clip) and burst sequences. The converter handles this by extracting only the first image ([0]) from multi-image HEIC containers. This is the primary still photograph in virtually all cases. The Live Photo video component and any additional images in the container are not extracted, as the converter focuses on still image format conversion.
HEIC decoding takes 2-5 seconds because the HEVC codec is being executed in JavaScript rather than compiled native code. Native HEVC decoders (like those in Apple's hardware) process images in milliseconds using dedicated silicon. The JavaScript implementation is functionally identical but runs on the CPU through the browser's JS engine, which is orders of magnitude slower for video codec operations. This is the price of browser-based HEIC support without native browser implementation — but it beats uploading your photos to a server.
7. ICO Generation: Multi-Size Favicon Builder
The ICO output format deserves its own section because it is not a simple image format — it is a container that bundles multiple images at different resolutions into a single file. The Image Format Converter generates ICO files with four sizes: 256x256, 48x48, 32x32, and 16x16 pixels, making the output suitable for use as both a website favicon and a Windows application icon.
The ICO generation pipeline works by rendering the source image onto four separate canvases, each sized to one of the target dimensions. For each canvas, the image is drawn at the target resolution using ctx.drawImage(img, 0, 0, targetWidth, targetHeight), which scales the source image using the browser's built-in bilinear or bicubic interpolation. The pixel data is then extracted from each canvas using ctx.getImageData(), which returns an ImageData object containing the raw RGBA pixel values. Each of these pixel buffers is then encoded as a PNG data stream — ICO files can contain either raw BMP pixel data or PNG-compressed data, and PNG is preferred because it produces significantly smaller files.
The four PNG images are then assembled into the ICO binary structure. An ICO file begins with a 6-byte header: two reserved bytes (always zero), two bytes indicating the image type (1 for ICO, 2 for CUR), and two bytes indicating the number of images in the container (4 in this case). Following the header are 16-byte directory entries, one per image. Each directory entry specifies the image's width, height, color count, reserved byte, color planes, bits per pixel (32 for RGBA), the size of the image data in bytes, and the byte offset where that image's data begins in the file.
A notable detail of the ICO specification is that the width and height fields in the directory entry are single bytes, which means they can represent values from 0 to 255. To handle the 256x256 image, the spec uses a convention where a width or height value of 0 means 256. This is not a bug or an encoding trick — it is part of the official ICO specification, defined by Microsoft, and every ICO decoder understands this convention. The converter correctly writes 0 for the 256px image dimensions and the actual pixel values (48, 32, 16) for the smaller sizes.
The bits-per-pixel value is set to 32 across all four sizes, indicating full RGBA color (8 bits each for red, green, blue, and alpha). After the directory entries come the actual PNG data payloads for each image, concatenated sequentially at the byte offsets specified in the directory. The entire structure is assembled using JavaScript's ArrayBuffer and DataView APIs for precise binary manipulation, and the final result is a single ICO Blob ready for download.
This multi-size ICO output is immediately usable as a website favicon. Place the file as favicon.ico in your site's root directory, and browsers will select the appropriate size from the container: 16x16 for the browser tab, 32x32 for bookmarks, 48x48 for Windows taskbar shortcuts, and 256x256 for high-DPI displays and Windows Explorer large icon views. No separate image files, no multiple <link> tags — one ICO file covers all standard favicon use cases.
8. Quality Control: The Compression-Quality Tradeoff
The Image Format Converter provides a quality slider ranging from 10% to 100%, with a default of 92%. This slider controls the compression level passed to the Canvas API's toBlob() method as the third argument — a floating-point value between 0.0 and 1.0 that the browser's image encoder uses to determine how aggressively to compress the output.
The quality slider is only meaningful for lossy formats: JPG, WebP, and AVIF. These formats achieve their small file sizes by discarding image data that is less perceptible to the human visual system. At quality 92% (the default), the encoder preserves most detail and produces output that is visually indistinguishable from the source for the vast majority of images. At 80%, compression artifacts begin to appear in smooth gradients and fine textures, but the file size drops significantly. Below 50%, artifacts become clearly visible — blocky regions, color banding, and loss of fine detail — but the files become very small, which can be useful for thumbnails or low-bandwidth scenarios.
For lossless formats — PNG, GIF, BMP, and ICO — the quality slider is automatically hidden. These formats preserve every pixel exactly as it appears in the source image, and no quality parameter can change that. PNG uses lossless deflate compression (the same algorithm used in ZIP files), GIF quantizes to 256 colors but preserves those colors exactly, BMP stores raw uncompressed pixel data, and ICO contains PNG-compressed images at full quality. Showing a quality slider for these formats would be misleading, so the converter hides it entirely.
In practice, understanding this tradeoff saves you from a lot of guesswork. A 5MB JPEG photograph at quality 92% might be 4.2MB — only a modest reduction. The same image at quality 80% might be 1.8MB — a dramatic reduction with minimal visible quality loss. At quality 60%, it might be 800KB — significantly smaller but with noticeable softness in detailed regions. The "right" quality setting depends entirely on the use case: a hero image on a homepage deserves 85-92%, a product listing thumbnail can use 70-80%, and a background texture that will be blurred anyway can use 50-60%.
A useful rule of thumb: quality 85-92% for images that will be viewed at full size, quality 70-80% for images that will be displayed at reduced dimensions, and quality 50-65% for images where file size matters more than visual fidelity.
9. Transparency Handling: Alpha Channels & White Backgrounds
Transparency handling is one of those things that trips up almost everyone at some point. Have you ever converted a PNG with a transparent background to JPG and gotten ugly black blotches where the transparency was? The Image Format Converter handles this deliberately based on each output format's capabilities.
PNG is the gold standard for transparency. It supports a full 8-bit alpha channel, meaning every pixel can have 256 levels of transparency from fully opaque to fully transparent. When converting to PNG, the converter preserves the source image's alpha channel exactly. If you convert a WebP with transparency to PNG, every transparent and semi-transparent pixel is faithfully reproduced.
JPG and BMP do not support transparency at all. The JPEG specification has no concept of an alpha channel — every pixel is fully opaque. BMP technically supports a 32-bit variant with alpha, but compatibility is poor and the converter targets the standard 24-bit RGB variant. When converting an image with transparent regions to JPG or BMP, the converter fills the canvas with white (#FFFFFF) before drawing the source image. This composites the image over a white background, turning transparent regions into white. Without this explicit white fill, the Canvas API would render transparent pixels as black — a common and ugly failure mode in naive image converters that fail to handle the alpha-to-opaque conversion properly.
WebP and AVIF both support alpha transparency, and the converter passes through the source alpha channel when converting to these formats. However, the actual transparency preservation depends on the browser's encoder implementation. In practice, both Chrome and Firefox correctly preserve alpha in WebP and AVIF output from canvas.toBlob().
GIF supports binary transparency — each pixel is either fully opaque or fully transparent, with no semi-transparent values. When a source image has semi-transparent pixels, the Canvas API's GIF encoder will snap them to either fully opaque or fully transparent based on a threshold, which can produce jagged edges around anti-aliased transparent regions.
ICO uses 32-bit RGBA PNG data internally and preserves full alpha transparency. This means you can create favicons with transparent backgrounds that display correctly over any browser tab color or desktop background.
10. AVIF Browser Detection
AVIF is the newest format supported by the Image Format Converter, and its browser support is not yet universal. While modern versions of Chrome, Firefox, and Safari can display AVIF images, the ability to encode AVIF through the Canvas API — which is what the converter needs — requires even newer browser versions. Specifically, canvas.toBlob('image/avif') requires Chrome 121+ or Firefox 113+.
To handle this gracefully, the converter performs a runtime feature detection test when the page loads. The test works by creating a tiny test canvas, calling canvas.toDataURL('image/avif'), and checking whether the returned string starts with 'data:image/avif'. If it does, the browser's Canvas API supports AVIF encoding, and the AVIF option is shown in the output format selector. If the returned string starts with 'data:image/png' instead (the Canvas API's default fallback when a requested MIME type is unsupported), the AVIF option is hidden entirely.
This detection approach is robust because it tests the actual capability rather than sniffing the browser's user agent string. User agent sniffing is unreliable — it breaks when browsers update, when users spoof their UA string, and when embedded browsers report different capabilities. The Canvas API feature test is a direct probe of the encoding capability the converter needs. If the browser can produce an AVIF data URL, it can produce an AVIF blob, and the option is enabled. If it cannot, the option disappears and the user is never offered a conversion that would silently produce a PNG instead of the requested AVIF.
As browser support for AVIF encoding continues to expand, the feature detection ensures the converter automatically unlocks AVIF output for users who upgrade their browsers — no update to the converter's code is needed.
11. Before & After: File Size Comparison
Every conversion performed by the Image Format Converter produces a before-and-after size comparison that shows four data points: the original file size, the converted file size, the percentage change (increase or decrease), and the conversion time in seconds.
This comparison serves a practical purpose beyond curiosity. When you are optimizing images for web performance, the size reduction percentage tells you exactly how much bandwidth each image will save. When you are converting HEIC to JPG for compatibility, the size increase tells you the storage cost of moving to a less efficient format. When you are testing different quality settings, the comparison lets you see the precise tradeoff between file size and the quality level you selected.
The percentage change is calculated as ((convertedSize - originalSize) / originalSize) * 100 and displayed as a positive or negative value. Converting a PNG screenshot to WebP at 85% quality typically shows reductions of 60-80%. Converting a JPEG to PNG (lossy to lossless) often shows increases of 200-400%, because PNG's lossless compression cannot match JPEG's lossy compression ratio on photographic content. Converting HEIC to JPG at equivalent quality typically shows an increase of 40-80%, reflecting HEIC's superior compression efficiency.
The conversion time measurement captures the full pipeline duration — from reading the input blob through canvas rendering to output blob generation. For Canvas API conversions (everything except HEIC), this is typically under 500 milliseconds even for large images. For HEIC files processed through heic2any, the conversion time reflects the JavaScript-based HEVC decoding overhead and typically ranges from 2 to 5 seconds.
12. Privacy: Your Images Never Leave Your Browser
The Image Format Converter processes every image entirely within your browser tab using client-side JavaScript. This is not a design choice that could be changed — it is a fundamental architectural constraint. There is no server to upload to. The HTML page, the JavaScript code, and the heic2any library are static files served from a CDN. Once loaded, they execute locally. The Canvas API is a browser-native interface. The Image() constructor, canvas.drawImage(), and canvas.toBlob() are all DOM APIs that run in the browser's rendering engine.
You can verify this yourself. Open your browser's Developer Tools (F12), switch to the Network tab, clear the log, and perform a conversion. You will see zero outgoing requests containing image data. The only network activity is the initial page load and, for HEIC files, the lazy-load of the heic2any library. Once those resources are cached, you can disconnect from the internet entirely and the converter will continue to function — because it has no server dependency.
This matters more than people realize. Photographs contain faces, locations, homes, documents, medical information, and intimate moments. Converting a photo's format should not require surrendering it to a third party's server, where it may be stored, analyzed, used for model training, or exposed in a data breach. The Image Format Converter makes this concern moot by never having access to your images in the first place. Your files exist in your browser's memory for the duration of the conversion and nowhere else.
One important privacy-relevant behavior: the Canvas API does not preserve EXIF metadata during conversion. EXIF data includes camera settings, timestamps, GPS coordinates, and device information embedded in the original image file. When the canvas draws an image and exports it, only the pixel data is captured — all metadata is stripped. This means converted images do not contain location data, camera model information, or timestamps from the original. For privacy-conscious users, this is actually a benefit — the converter acts as a metadata stripper in addition to a format converter. For photographers who need to preserve EXIF data, be aware that conversion through the Canvas API will remove it.
13. Image Converter vs. CloudConvert, Squoosh & TinyPNG
The image conversion space has several well-known players, and I want to be straightforward about how we compare. Here is an honest look at the Image Format Converter alongside three popular alternatives.
CloudConvert is a server-based conversion platform that supports over 200 file formats across images, documents, audio, video, and more. It is powerful and comprehensive, but it requires uploading your files to CloudConvert's servers for processing. The free tier allows 25 conversions per day, and paid plans start at $8 per month for 500 conversions. For professional workflows with high volume, CloudConvert is a capable service — but every image you convert passes through their infrastructure, and you are dependent on their privacy policy and data handling practices. The Image Format Converter handles fewer total formats but processes everything locally with no upload, no account, no daily limits, and no cost.
Squoosh is a web-based image optimizer created by the Google Chrome team. It uses WebAssembly builds of image codec libraries (MozJPEG, libwebp, AVIF, etc.) to provide high-quality compression with a visual comparison interface. Squoosh is excellent for its intended purpose — optimizing a single image with fine-grained control over codec parameters. However, Squoosh is limited to one image at a time (no batch processing), supports fewer input formats (no HEIC, no ICO, no BMP), and does not generate multi-size ICO files. While Squoosh does process images client-side using WebAssembly, its scope is image optimization rather than format conversion. The Image Format Converter is broader: 11 input formats, 7 output formats, HEIC decoding, ICO generation, and conversion-focused features like before-and-after size comparison.
TinyPNG (which also handles JPEG despite the name) is a popular image compression service that focuses on reducing file sizes for PNG and JPEG images. It uses smart lossy compression algorithms — quantization for PNG (reducing the color palette from millions to thousands of carefully chosen colors) and advanced JPEG optimization. TinyPNG is very good at what it does, but it is server-based (your images are uploaded and processed on TinyPNG's servers), limited to only two formats (PNG and JPEG), and has a free tier of 500 compressions per month. It cannot handle HEIC input, cannot produce WebP or AVIF output, cannot generate ICO files, and requires an API key or paid plan for high-volume use.
The fundamental differentiator of the Image Format Converter is the combination of format breadth, specialized features (HEIC decoding, ICO generation, AVIF detection), and absolute client-side processing. No other tool offers all three simultaneously. CloudConvert has the format breadth but requires uploads. Squoosh has client-side processing but limited formats. TinyPNG has neither the format breadth nor the client-side processing.
14. Frequently Asked Questions
Can I convert HEIC photos from my iPhone without installing any app?
Yes. The Image Format Converter decodes HEIC files entirely in your browser using the heic2any JavaScript library. Drop your HEIC photo into the converter, select JPG, PNG, or WebP as the output format, and download the converted image. No app installation, no desktop software, no uploads to any server.
Why does HEIC conversion take longer than other formats?
HEIC is based on the HEVC (H.265) video codec, which browsers do not natively support for still images. The converter uses a JavaScript-based HEVC decoder (heic2any) that reimplements the codec in JS. This works correctly but runs slower than native browser decoders — typically 2-5 seconds per image depending on resolution and device speed. All other format conversions use the browser's built-in Canvas API and complete in under a second.
Is AVIF better than WebP?
In terms of compression efficiency, yes. AVIF typically produces files 20% smaller than WebP at equivalent visual quality, because it is based on the newer AV1 codec (2018) while WebP uses the older VP8 codec (2008). However, WebP has broader browser support and faster encoding times. For maximum compatibility, use WebP. For maximum compression where you can control the viewing environment, use AVIF. The converter supports both, and the before-and-after size comparison lets you test each format on your specific images.
What happens to transparent backgrounds when I convert to JPG?
JPG does not support transparency. When you convert an image with transparent regions to JPG, the converter fills the background with white before rendering the image. This is an intentional design choice — without the white fill, transparent areas would appear as black (a common problem in naive image converters). If you need to preserve transparency, convert to PNG, WebP, or AVIF instead.
Can I create a favicon from any image?
Yes. Select ICO as the output format and the converter will generate a multi-size favicon containing four resolutions: 256x256, 48x48, 32x32, and 16x16 pixels. The output ICO file is ready to use as a website favicon — place it as favicon.ico in your site's root directory. The converter handles the entire process: scaling the source image to each size, encoding each as PNG, and assembling the binary ICO container with proper headers and directory entries.
Why is my converted PNG file larger than the original JPEG?
PNG is a lossless format that preserves every pixel exactly, while JPEG is a lossy format that achieves smaller sizes by discarding data. Converting from JPEG (lossy) to PNG (lossless) will almost always increase the file size — often by 200-400% for photographs. This is expected behavior. If you need a smaller file, convert to WebP or AVIF instead, or stay with JPEG. Use PNG only when you need pixel-perfect reproduction or alpha transparency.
Does the converter preserve EXIF data like GPS location and camera settings?
No. The Canvas API extracts only the pixel data from the source image — all EXIF metadata (GPS coordinates, camera model, exposure settings, timestamps, orientation) is lost during conversion. This is a limitation of the Canvas API, which operates on pixels rather than file-level metadata. For privacy-conscious users, this is a benefit: converted images are automatically stripped of potentially sensitive location and device information.
What is the maximum image size I can convert?
There is no hard limit set by the converter. The practical constraint is your browser's maximum canvas size, which varies by browser and device. Chrome supports canvases up to approximately 16,384x16,384 pixels (268 megapixels). Firefox supports up to about 11,180x11,180. Most smartphone photos (12-48 megapixels) and even professional DSLR images (50-100 megapixels) fall well within these limits.
Why is the AVIF option not showing for me?
AVIF encoding through the Canvas API requires Chrome 121+ or Firefox 113+. The converter tests your browser's AVIF encoding capability on page load — if your browser cannot encode AVIF, the option is automatically hidden. Update your browser to the latest version to unlock AVIF output. Safari's AVIF encoding support through Canvas is still limited as of early 2026.
Can I convert multiple images at once?
The converter processes one image at a time with full control over output format and quality settings. For batch image conversion across multiple files, use the MORPH Media Converter on ZeroDataUpload, which offers a dedicated batch mode for image conversions with the same client-side privacy guarantee.
15. Conclusion
The Image Format Converter addresses a universal problem — format incompatibility — with a solution that respects both your time and your privacy. By combining the browser's native Canvas API with the heic2any JavaScript decoder, it covers the full spectrum of image formats: from Apple's HEIC that your iPhone produces but your website cannot display, through legacy formats like BMP and TIFF that still appear in enterprise workflows, to next-generation formats like WebP and AVIF that deliver dramatically better compression for the modern web.
The technical foundation is sound and transparent. The Canvas API pipeline loads, renders, and re-encodes images using the browser's own hardware-accelerated image engine. The heic2any library bridges the one format gap that browsers refuse to fill natively. The ICO generator assembles proper multi-size favicon containers with correct binary headers. Quality control is precise and honest — shown for lossy formats where it matters, hidden for lossless formats where it does not. Transparency handling is format-aware, filling white backgrounds for JPG and BMP while preserving alpha for PNG, WebP, AVIF, and ICO. AVIF support is feature-detected at runtime rather than assumed.
Every conversion produces a clear before-and-after comparison so you can see exactly what the format change costs or saves in file size. And every conversion happens entirely on your device — no uploads, no server processing, no accounts, no daily limits, no subscription fees.
In a landscape where image conversion services routinely require you to upload your personal photographs to remote servers, the Image Format Converter demonstrates that a better approach exists. The browser is a capable image processing platform. The Canvas API is a powerful conversion engine. And your images should stay on your device where they belong.
The Image Format Converter is available now on ZeroDataUpload. Convert between HEIC, WebP, AVIF, PNG, JPG, GIF, BMP, TIFF, SVG, and ICO — directly in your browser, with complete privacy.
Related Articles

Published: March 26, 2026